Create your own NFT art gallery for free using Cryptovoxels Spaces 🤯🎨
👩🎨 Reasons to make your own NFT art museum
Having a collection of your artwork displayed digitally for anyone with a phone, computer, tablet or Quest 2 [VR HMD] to see, without even signing up for an account, allows your creations to be easily seen and emulates a physical museum more than a website.
There are a few different metaverses to host your NFTs, but after trying a lot of different ones out, the best experience came out of Cryptovoxels.
🤔 Cryptovoxels Parcel and Space differences

Parcels are plots of land in the Cryptovoxels world and are purchasable via OpenSea, whereas a Space is free; however there are limitations to a Space:
- Spaces are single player only, so although you can send your Space’s unique link to someone and multiple people can be on it simultaneously, you will not be able to see or talk to each other
- Spaces are not apart of the Cryptovoxels world, so you will not have neighbors and people will not find it by walking around or be able to search for it — the only way in is by your link
- Spaces do not allow for scripting, light baking or the ability to womp [which is to take a screenshot that appears on the front page]
- Spaces have a white-grayish “sky” and cannot be changed to day or night using the &time=night or &time=day flags, however sky can be emulated using clouds/stars MP4s or GIFs
- Spaces do not have a map [there is no need] or public chat but does give you the ability send and receive messages [via Inbox on menu]
👷♂️ Creating your own Cryptovoxels Space
The first thing you’ll need is a free MetaMask account set up.
Head over to https://metamask.io/, download and configure. If you’re using Chrome and do not see the MetaMask icon, click the extension button, then hit the pin button to the right of MetaMask.

After MetaMask has been successfully configured, head over to https://www.cryptovoxels.com/account/spaces and click Sign in with MetaMask on the top right.

You should see a pop-up asking you to Sign — this is normal. Click Sign and continue to the page. If you don’t see the pop-up, click the MetaMask icon.

Now, name your Space, set your size and hit the Create! button.

After hitting the Create! button, you’ll be sent to your new Space. Woo!

🔨 Building in Cryptovoxels
Building in Cryptovoxels is very similar to Minecraft in the blocky aspect, but also has the ability to add MP4s, VOXes, PNGs and more built-in. The list of features can be found here.
Keybindings to help you get started:
- W A S D: Move around [look around using mouse]
- SHIFT: Run
- SPACE: Jump
- F: Fly
- TAB: Build menu
- H: Help menu
- 1–9: Change block tile
- [While block is selected] Click once or click, hold and drag to place blocks
- [While block is selected] Hold SHIFT to erase blocks
- [While block is selected] Hold CTRL to replace blocks
Working with blocks
In your Space, select a tile either using the 1–9 keys or by opening the Build menu and selecting your tint & tile texture.
You can click once to place a block, or click, hold and drag to add a few. You can also click, hold and drag to erase and replace. See GIFs below!
You can also replace the colors and textures of the blocks. For more information on how to do that and more about building, head over to the very resourceful Cryptovoxels Wiki.
Adding your NFT art from OpenSea or other places
If your art is on OpenSea, it can be easily added into Cryptovoxels by going to the build menu [TAB] and selecting NFT Image or NFT Model.
Be sure to click on the checkbox that states “Show Gui on click” as this will make it so that when the user clicks your art, it’ll show the higher quality version on a bigger scale. You’ll also want to hit the Stretch checkbox if your art is not 1:1 [or if you see the animation glitching out (as of 5/8/2021)].

You also have the option to display MP4s instead and have the ability to make them play on click or auto-play when the user enters. Be sure to change the Blend mode to Combine if you don’t want any transparency added to it.

If your art is somewhere else, like on hicetnunc, you can still pull video or photos from there and add it to your Space, then add a link to it [if it’s an image] or next to it [if it’s a video]. Below is an example of me taking a video piece from hicetnunc and putting it in a Space.


Adding frames to your art
If you own the NFT and it’s on OpenSea, all you have to do is click the Show frame checkbox under the properties.

If the NFT is not on OpenSea, or you don’t own it, there are other ways to add frames. One trick is putting an NFT you do own behind it, making the frame appear to be for the only visible art. The other option is to use a VOX model.

Luckily, Cryptovoxels comes with a library of VOXes you can choose from, so you can easily add it around your NFT. Add a VOX and click on Library in the VOX properties, then scroll down to Picture frames and select one.

Use the scale and position parameters to make it go around your NFT nicely.

You can also use MagicaVoxel to make your own frames or, really, anything! And it’s free! Download MagicaVoxel here. Also, here is a good video guide to get started and here is a good written guide to use as a reference.
🤓 Other useful info
The URL to your space can be modified to make it easier to get to, which is pretty awesome! Head over to the Spaces account page here, then under your Space, click View space page.

From this page you can change the Space name, add a description, change the slug [URL] or copy the shareable link.

The other great thing is that you can attach a link to your Space anywhere! For example, you can attach a link to your Space, to a QR code like this. Below is a Raspberry Pi with a few mirrors, emulating the cube in Cryptovoxels with the QR code in question.

You can do the same thing with AR as well, as shown here.

Lastly, the Cryptovoxels Discord is a great source of info, with an active community and the friendly CV team: https://discord.gg/rQVMQax
🤩 Inspiration for your Space
Inspiration is all over. You can look at physical museums, modern homes, Minecraft builds or just walk around Cryptovoxels for inspiration!
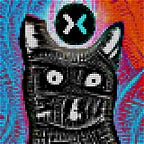
Of course, here are some Parcels to help you get started. :)


😻 Closing comments
I hope this guide was helpful in getting you started on your journey towards creating an NFT museum. If it wasn’t, send your rage email to thisisnotmyemailaddress@aol.com. You can also pick up this guide as a PDF on hic et nunc for 0.01 tez if you want to show some love. :)
I wish you the best of luck with your newly found knowledge! If you ever need assistance, or just want to show off your awesome creations, you can reach out to me on Twitter.