Create your own Cryptovoxels wearables to use, sell or trade 👚
I’m now working on the Cryptovoxels Wiki, so I’d advise checking out this page instead of reading this article as it is more up to date. 😺👍
Feel free to use the TOC below to jump through to the section that you need.
If you’re a noob in regards to CV wearables, I’d suggest reading it all. 📚🎉
- 😸 Different type of wearables in Cryptovoxels
- ✅ Requirements to mint wearables
- ⛽ Why using Matic is better and why it is not
- 🔨 Using MagicaVoxel to make wearables
- 👗 Trying it out (kinda) in CV before minting
- 👍 Creating a wearable collection
- 👓 Minting wearables on Cryptovoxels & OpenSea
- 📮 Submitting a wearable to a collection
- 🔛 Trading the wearable to someone
- 💲 Putting the wearable for sale on OpenSea
- 👑 Wearing & customizing your wearables
- 👀 Customizing your collection & royalties
- 🏪 Create a store in a Cryptovoxels
- 🕵️♂️ Wearable collections to check out
- 🙋♂️ Closing comments & tips
😸 Different type of wearables in Cryptovoxels
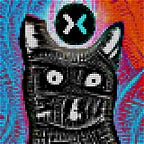
From shoes to wings, and cats to hoodies, anything can be a wearable. If the creation’s voxels fits in a 32x32 space, it can be a turned into a wearable. The owner of the wearable can adjust the position, rotation & scaling when equipping the wearable, so keep that in mind.

You can attach wearables to different parts of the body: Hips, Spine, Neck, Head, Shoulders, Arms, Hands, Legs & feet. Damn, that’s a lot of options!

This is especially cool on the native Quest 2 app, where the wearables on your hands will be controlled by the VR controllers [or hands themselves if they add in Quest 2’s built-in Hand Tracking]. This will be added in later builds and is currently not possible on the most recent alpha build [as of this post].
✅ Requirements to mint wearables
Cryptovoxels wearables live inside collections [e.g. Fayelure lives inside the VoxelKitties collection]. In order to create a collection, you’ll need to own a Cryptovoxels Parcel.
If you don’t own a Parcel, you’ll either need to submit to a public collection or ask someone that owns a Parcel to make a collection for you [do keep in mind, you’re only allowed one collection PER Parcel].

There are also community guidelines for the wearables - they can’t contain offensive [racist, discriminatory or violence-endorsing] or NSFW content.
Every transaction requires gas - so you’ll need Matic on the Matic Mainnet to make a collection or to mint something [or ETH if you’re sticking with Ethereum Mainnet].

Lastly, which I assume you have but will mention anyway, you’ll need a wallet. Meta Mask is used throughout the tutorial, though Cryptovoxels recently added support for CoinBase wallet & WalletConnect as well.
⛽ Why using Matic is better and why it is not

The good? Extremely cheap gas fees for minting and for purchasing, making wearables accessible to more people and lead to more experimenting [if you don’t have any Matic, use this faucet to get some for free]. And since it’s Proof of Stake instead of Proof of Work, it’s better for the environment [though yes, it still depends on ETH].
The bad? The customer has to purchase the wearable using PoS-ETH, which they may not have. OpenSea will guide the customer through purchasing or converting PoW-ETH if there is none in the wallet, though this is another step the customer may have to take.

🔨 Using MagicaVoxel to make wearables
You’ll need MagicaVoxel to create the wearables. What is this magic I speak of? It’s a free voxel art editor program thingie that can be downloaded here.
The first step is to set the size to 32x32x32 - you can do this by selecting the 40s on the top, typing 32 and hitting enter.

From there, well, uhh, go make your wearable! This guide doesn’t really go over how to make it from scratch, but I can point you to some helpful guides:
- 4 minute quick start video [keep in mind icons are from an older version]
- ~30 minute detailed video [ignore the Render part]
- Cryptovoxels official wearable creation guide [the MagicaVoxel part is up-to-date, the rest needs an update]
MagicaVoxel also has the ability to import certain filetypes, like PNGs! 🙀 You might want to downscale it to 32x32 beforehand though [and if you do it in Photoshop, make sure to use Nearest Neighbor for the resample type].

The magical program can also import OBJs! 🧙♂️ Yesh, 3D objects, woo!

When you import the file, MagicaVoxel may include a hidden layer, which you’ll have to erase - otherwise you won’t be able to import your VOX into Cryptovoxels. Look at the GIF below to see how to erase.
After importing the file, double click on it in MagicaVoxel to start editing, and again, make sure the size is 32x32x32. The best way to learn MagicaVoxel is to funk around, so go make something. 😸
The other great thing about MagicaVoxel is that you can use shaders [scripts] to ease the process of things and use other people’s color palettes. Shaders go into the shader folder and palettes go into the palette folder. Easy enough!

Lychi recently linked me some great ones over here. Some of them can be accessed from the Shader toolbar on the right, and some can be accessed by the console, which is on the bottom to the right of the camera icon. Palettes can be opened by clicking the folder button on the left side under the colors.

👗 Trying it out (kinda) in CV before minting
Although there is no official feature to try the wearable on first before minting, you can place the VOX in your Cryptovoxels Parcel [or find a sandbox] and walk into it to somewhat emulate it.
After dropping the VOX in and adjusting the position/scale/rotation, hit C to go into third person and walk into it. It may be ghetto, but at least it gives you an idea. You can also use scripting to have it follow the avatar as well, but that’s probably overkill.
Now we’ll need a collection to put the wearable in. If you own a Parcel, read the next two sections. If you don’t own a Parcel, skip the two next sections and read about submitting to a collection instead.
👍 Creating a wearable collection
Before we begin, keep in mind that things may have changed since creating this guide, so if something isn’t 1:1 please let me know on Twitter or Discord.
- Head over to https://www.cryptovoxels.com/collections
- Log into Cryptovoxels / Meta Mask
- Click Make your own!
- Click Create a collection

5. Click on the Create a collection button

6. Select the Chain Id [Matic recommended] and click the Next button

7. Meta Mask may ask you to switch networks, click Switch network if you get a prompt [ignore if you don’t]

8. Fill out the collection’s information, click the Save & Next button [you can modify the name, description and logo any time via the ⚙Admin page]

9. Name the contract, click the I assert… checkbox and the Upload And Deploy button to continue

10. You’ll need Matic on the Matic Mainnet to proceed with the next step, so once you have some available, click Confirm

11. You should see this message meow

If you don’t see that, you may see an error and warning banner stating it didn’t work, just click Click here to try again… if that happens

12. After waiting about a minute, you should see this:

13. Fill out the missing info and add a logo [this can be adjusted in the future]

14. After all the info is filled out, click the checkbox that states I assert that I own or have rights to this collection, and agree to the terms of service, then click the Submit button

15. All the text should have cleared and a message with a greenish background should have appeared - click on the link that states Click here to see it!

16. You should now see your collection - click the ⚙Admin button and bookmark the page

17. Meta Mask should have popped up asking to confirm the transaction [this will require a tiny bit of Matic], click the Confirm button, then click Save changes [if you refresh the page and the warning is gone from the top, that means you’re good]
Now that you’ve created a collection, it’s on to minting a wearable!
👓 Minting wearables on Cryptovoxels & OpenSea
Minting time! Head to your collection page and make sure you’re signed in [it’ll be something like cryptovoxels.com/collections/8#]. Ya there? Cool.

- Click the 🏭Mint button.
- Enter the Name & Description, do not touch the Owner info
- Set the amount of Issues
Rarity: 1–9 Legendary | 10–99 Epic | 100–999 Rare | ≥1000 Common - Click the Choose File button and select your VOX file
- Click the checkbox that agrees with the TOS
- Click the Submit button

If you scroll down, you should meow see your submission under Collectible submissions - if you do not, hit the Refresh button.
Your Preview may look broken, like this:

If that’s the case, hit the Refresh gif button under Action. You’ll see this window open up afterwards:

It should state ok if everything is, well, okay. If it is okay, refresh the page [F5], then click 🏭Mint and scroll down to look back at the submissions.

If everything looks good, click Mint. If something looks amiss, click Reject.
If you do mint it, you should see Meta Mask pop-up to confirm the transaction, which will require a very tiny amount of Matic - click the Confirm button to proceed to mint.

If it worked, you should see a small pop-up:

Under Collectible submissions, there will be a link to the right that states Collectible ready, click that.

You should now see your wearable on the Cryptovoxels page! Woo!

Congrats on your first wearable! If you just want to wear it now, jump down to the customize wearables on your character section, but if you want to sell or trade it, skip the next section and continue reading on.
📮 Submitting a wearable to a collection
If you don’t own a Parcel, you can always submit to a public collection.
- Head over to https://www.cryptovoxels.com/collections
- Click the Available to public checkbox

3. Select a collection [like this one]
4. Click the 🏭Submit button

5. Read the warnings, fill out the info and click the checkbox on the bottom, then click the Submit button
6. You’ll now have to wait for it to get approved by the collection owner — you may want to send them a message through Cryptovoxels / Discord / Twitter
7. Once the wearable is minted by the collection owner, you’ll get a message on Cryptovoxels [you’ll see a red dot next to Inbox on the top if you get it]

We do have this public collection available if you’d like to submit a wearable and do not own a Parcel; or you can look through here, then click the Available to public checkbox and it’ll list only the ones you can submit to.
🔛 Trading the wearable to someone
You can transfer wearables either on the Cryptovoxels website or on OpenSea.
To transfer using the Cryptovoxels website, head to the wearable you want to send [e.g. https://www.cryptovoxels.com/collections/8/67] and click the Transfer button on the bottom. If you don’t see the Transfer button, it either means you need to switch networks in Meta Mask or that you do not possess any amount of that wearable.

A dialog will pop up asking who to transfer to and how many. Fill that out and hit the Transfer button.

It’ll then ask to confirm the address [do confirm!] - if it looks good, click the OK button. Meta Mask will pop-up asking to confirm the transaction [small Matic fee], click the Confirm button to continue. A dialog will show the transfer in process and then close. You should have less quantity of that wearable now.
If transferring isn’t working on Cryptovoxels or you’d just prefer to send it over OpenSea, you can do so as well. Head to the wearable on OpenSea and click the Transfer button located on the top right.

💲 Putting the wearable for sale on OpenSea
If you want to sell your wearable, which hey, you might want to, you’ll have to price it on OpenSea. Go to one of the items in your collection on the Cryptovoxels page and then hit the Buy Now button.

On your listing in OpenSea, if you DO NOT see your wearable rotating around, you may have to click the Refresh metadata button on the top right. If it’s still not visible after waiting a minute, you may have to report this as a bug on the Cryptovoxel’s Discord, or possibly wait a little longer.

You should now be on the OpenSea page with your wearable rotating around. Click the Sell button.

Just a heads up - after your wearable is posted for sale, the Sell button shifts downward, under Listings.

The Sell your item dialog will pop-up after hitting the Sell button. Put the amount, in ETH, for how much you’re going to sell your wearable for. Keep in mind OpenSea will take 2.5%. There may also be royalty fees involved too, but you shouldn’t see that now.
You can also set an end date to the sale, in case you want it listed for a limited time. If you want, click Schedule listing and set the end date.

Once everything is said and done, click the Complete listing button. Success!
👑 Wearing & customizing your wearables
We’ll need to make a costume first before wearing any wearables, changing skin color or removing body parts [🙀].
Head to https://www.cryptovoxels.com/account/costumes, make sure you’re signed in, and click the Add costume button on the left.

A costume named costume#xxxxx will appear on the left. You can click the pen icon to rename the costume if you’d like. Click the ✔ button on the right side to make it your active costume - it should have a yellow background now.

Click your costume text [in my case, costume#8675309] to make the Wearables and Skin tab pop up, then click the Wearables tab.

Click the Select a Wearable… dropdown menu button on the left side and select your wearable. If you don’t see any listed, click the 🦑Refresh button and wait a bit, then refresh the page [F5].

Once you see your wearable on the list, select it and the wearable will be added to your character. If it’s anything like below though, it probably needs some moving around, scaling & rotating done to it first.
You can left click the empty area to rotate the camera. You can also middle click any area to rotate the camera. Right click to pan the camera.

You can move the wearables either by using the gizmos or the editor. To begin, click the wearable - a gizmo should appear over it. Watch the GIF below to see how to adjust it using the gizmos.
You can also use the editor, which I much prefer. Clicking the wearable should the open editor button on the top right, click that to access the editor.
If you’re setting up a wearable and it’s for a body part that isn’t your head, select the part first by clicking the Bone dropdown menu. This will reposition the wearable to the body part. You’ll probably still need to adjust it to your liking, but at least the wearable will be bound to that part while walking, dancing, waving, etc.
There is also another tab to change your skin color and to remove any body parts you want - click the Skin tab to alter those properties.
Clicking the checkbox on the left of the body part will hide it and clicking the rectangle to the right will open the color selector tool.
As of this article’s date, there is a limitation of 7 wearables per costume. If that changes in the future [I hope it does], this article will hopefully be updated. :)
Once you have your costumes set up, you can quickly change to them within Cryptovoxels by hitting the G key, then going to the Costume tab.
And with no body, things can get funky.
Check out some useful GIFs that the CV team made by clicking the !? Help link on the left side for more information about setting up your wearables.
👀 Customizing your collection & royalties
You can customize your collection on Cryptovoxels & on OpenSea. Let’s start with CV - head to your collection page and click the ⚙Admin button.

Under Settings you get the ability to change your Collection Name, Description, Cover Color and Logo. Take note of your Slug as you can use that to redirect people [e.g. cryptovoxels.com/collections/voxelkitties].

Under Social and interactions you can add your Twitter handle, OpenSea store, In-world store [if you own a parcel, enter the ID] and Featured collectible [enter the ID of the token]. If you enter this all, you’ll see your Twitter feed and featured collectible on the right hand side on the collection page and two new buttons [View on Opensea & Visit store] will show.

You can also add up to three attributes to your wearables.

Click Add a trait and your first attribute is ready to edit.

Here are the types that OpenSea provides. Below is what I put for VoxelKitties.

Meow that custom attributes are set in the collection, we can add attributes to existing wearables and future wearables. On the Mint page, the last option will be custom attributes. As you can see below, I ignored the middle attribute for the Clowder as that one is only for VoxelKitties themselves.


If you want to add attributes to an existing wearable, head to the wearable’s page on Cryptovoxels and scroll down - it’ll be on the bottom. Add the info and hit the Save Attribute button when ready.

Below you can see how it looks like on OpenSea. The AUTHOR, RARITY & VOX Properties are done by Cryptovoxels and TYPE was added by me. Under Stats you can see the # & Generation that was added as well.

Before we start customizing on OpenSea, we have to let them know you are the actual owner. For this to occur, copy your Address from your collection’s Admin page and then we’ll head to OpenSea.

On OpenSea go to the Collection Manager, click the hamburger dots and select Import an existing smart contract.

Click the first button, Live on a mainnet, then click the dropdown on the left, select Polygon, enter your address and click the Submit button.

This process may be changing, but as of this post, once submitted, you have to wait until someone manually connects your collection to your account. You’ll know if your connected if you’re able to edit your collection on the Collection Manager page.

Once your account is connected, you’ll be able to edit your collection information like a typical OpenSea collection.

If you scroll down you’ll get to the Royalites section. From here, you can put up to 10% for the fee and enter your payout wallet address.

Have fun customizing your collection!
🏪 Create a store in a Cryptovoxels
If you own a Parcel, you can place your wearables out on display for people to purchase or to check out.
If you don’t own a Parcel, or if you need more room than your Parcel can handle, you can use a Space to display your wearables as well. Just keep in mind your store will only be accessible via a link and there is no third person mode in Space. Learn more about Space on my other guide here.

🕵️♂️ Wearable collections to check out
All the Cryptovoxels collections can be found here. Below are a few different ones that show you the range of what is possible for wearables.
- Cryptovoxels Wearables
Wide range of wearables from various creators. The OG. - VoxelKitties [parcel storefront]
Cat heads, mini kitties and emojis! - Lychi’s Bakery & Cafe [parcel storefront]
Show your love for sweets wherever you go. - ziira fashion
Game Boys, wings and more. - OCM Barber Shop
Purple trees and beards. - The Patternbase
Unique, trend-driven wearables, textiles, and art objects. - Back Lounge Wear
Curated, commissioned and customizable wearables for the metaverse. - Stella Threadz [parcel storefront]
Colorful faces and dresses. - Hyperspek
Apes, hats, and full-on getups. - Black Fractal Arms [parcel storefront]
Voxel arms and armor by The Black Fractal. - LITTY POP UP SHOP [parcel storefront]
Bags, glasses and more. - Uncle Bitcoins Personal Stash
Shoes, meat heads and pizza. - Glaem Accessories Shop [parcel storefront]
Eyes, hair and stars. - Vorg.eth Voxels
Star Wars gear, glasses and crowns. - A BITTREES COLLECTION
Instruments and mustaches. - Interesting Digital Stuffs
Croissants, shoes and signs. - n0wear collection
Shoes that are bundled with certificates. - Tempel Tuttle Footwear [parcel storefront]
Wide variety of boots and shoes. - bitpixi swag
VR HMDs to floppy disks. - Warriors of San Fran
Warriors of SF is the island’s basketball team. - PrisonX [parcel storefront]
Gear from an infamous Bolivian jail inside a Neo-Andean underworld. - Fuck Off Love [parcel storefront]
An eclectic collection of wearables designed by KOAxyz artists. - Baby Bombs
Cute little Baby Combs to follow you around. - Le Marais Wearables Gallery [parcel storefront]
Wearables designed by Fireball and Bullauge.

I think that’s enough collections for meow! Phew. 😅
🙋♂️ Closing comments & tips

I hope this guide was useful on your journey towards creating awesome, interesting or just plain weird Cryptovoxels wearables. Below are some random tips that may or may not be useful. :)
Use Airtable for organizing your wearables/NFTs. The ease of switching between spreadsheet mode [Grid] and photo mode [Gallery] is really convenient and it may ease the process of adding new wearables.
On your collections page you can check the right side for the most worn wearables in your collection, sorted by rarity and players wearing it. It’ll only show the top 5 though, for meow.
Another fun and awesome thing to do is make custom wearables for people! When I make a custom VoxelKitty, I create many mock-ups, send them over and ask what needs to be tweaked or combined. I ask them to pick colors either from a site like this or from a piece of art that I can pull from.

I think this is key to life in general but I must stress it anyway - always thank the people who buy your wearables! Be grateful. If you can’t find them on Twitter/Discord/Instagram/Myspace then message them via Cryptovoxels.
I’ll be updating this guide randomly, so if you have a wearable, outfit or collection that is interesting, tweet it out to me and I may add it in here.
If you found this guide useful, I would greatly appreciate a retweet of this to spread this info around - thanks in advance!
Good luck and have fun with your wearable creations! See you in CV.
😸👍